Description
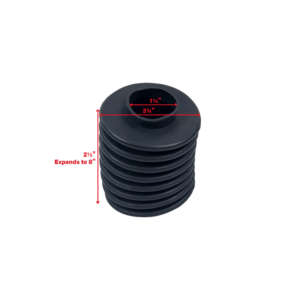
Bottom plate is 10″ x 10″. Holes are 8.25″ center to center. Top plate is 7.5″ x 4″. Spring is 13 5/8″ long and spring with boot is 15″ long. The diameter of the spring coil is ¾” and the diameter of the spring is 5 5/8”. This product should last 2 years in harsh conditions and up to 5 years in optimal conditions. Some conditions may require replacement sooner. Tensile strength is 1200 lbs..
This is for children 2 – 12 years old only. These are designed for use by one child at a time. Adults should supervise children at all times. Do not allow children to stand on or use unsafely. Do not allow it to be used if damaged.
IMPORTANT: Please read for important information. In this material we have tried to provide some requirements stated in the CPSC Handbooks, ASTM F2373-11, F1487-11 and F1148-09. However, we in no way intend for this to be a complete list of requirements. Also these publications are updated frequently with changes therefore, you should read these publications yourself to determine if any part or installation could prove a danger to a child.
To help keep children safe from harm, review installation and maintenance instructions before installing equipment. These are located in the description of every product on our website. www.jensenswing.com Download and print these instructions and keep in a safe place. Our website also has a “Product Testing Information” page. All products are tested for lead, phthalates and tensile strength. You can also call us at 1-800-227-7529 for more information or see http://www.cpsc.gov/cpscpub/pubs/325.pdf.
Installation: Our parts are sold as either replacement parts or components of a set, unless you are buying our Metal Frame Set, therefore these parts need to be installed according to the sets installation instructions. If the installation instructions differ from ours please contact us at 800-227-7529.
Go to www.jensenswing.com and then to Resources to see more on Installation of the Spring Riders
Step 1) Pour concrete and place the “J” bolts so that they will fit in the outer edges of the larger black plate.
Step 2) Begin Spring Assembly
- See video for more info on positioning
- Make sure that the center of the silver casting is flush with the plate
- Screw bolts so that the heads of the bolt will be below the plate and the threads are coming through the top of the spring casting
- Tighten spring casting to spring and bottom plate using the provided nuts
Step 3) Begin Top Spring Assembly
- See video for more info on positioning
- Remove the small black plate that either comes attached to the spring rider or is sent with the hardware that comes with each spring rider
- Make sure that the center of the silver casting is flush with the plate, if it is not looking like it will be flush with the plate – double check the video on positioning and the orientation of the spring casting itself
- Screw the hex head bolts so that the heads of the bolts are on the flush side of the spring casting and the threads of the bolts are facing upwards
- Tighten spring casting to the spring and top plate using the provided nuts
Step 4) Attach Spring Rider
- Using the smaller black plate that was just secured to the spring – reattach the spring rider using the 4 smaller hex head bolts so that they go through the casting and tighten into the underside of the spring rider.
Step 5) Attach spring and Plates and Spring Rider to concrete
- Taking the whole assembly of the spring rider that we have just assembled – place it onto the J bolts that were secured in Step 1 – and tighten them so that the spring rider is secured.
How to insert silver spring casting into spring:
*NOTE: Allow enough thread on anchor bolts to secure bottom plate to footing.
Maintenance: At beginning and end of each play season and once a month during play season, check for cracks, rust, missing or loose hardware or evidence of vandalism. Make sure there are no tears in rubber boot that children could get their fingers pinched in spring. Tighten and lubricate all metallic moving parts. Replace as needed. Make sure there are no exposed footings, anchoring devices, rocks, roots, holes or any other obstacles in or around spring animals. Maintain detailed inspection and maintenance records for public-use playground equipment.
Any damage from vandalism, abuse or misuse VOIDS all warranties.


